In this blog series I will share with you my goal and camera settings for some of my favorite recent photographs, which will be featured in my 37th book, Evolution of an Image .
Read More"Hey Rick, What's your f-stop?"

lighting
In this blog series I will share with you my goal and camera settings for some of my favorite recent photographs, which will be featured in my 37th book, Evolution of an Image .
Read MoreGuest Post by Ann Marie DiLorenzo
At the Canon booth at the 2018 Photo Plus show in NYC, Rick Sammon promised the audience that he’d give at least 10 tips during his presentation. Well, Rick actually gave 20 tips. Here they are!
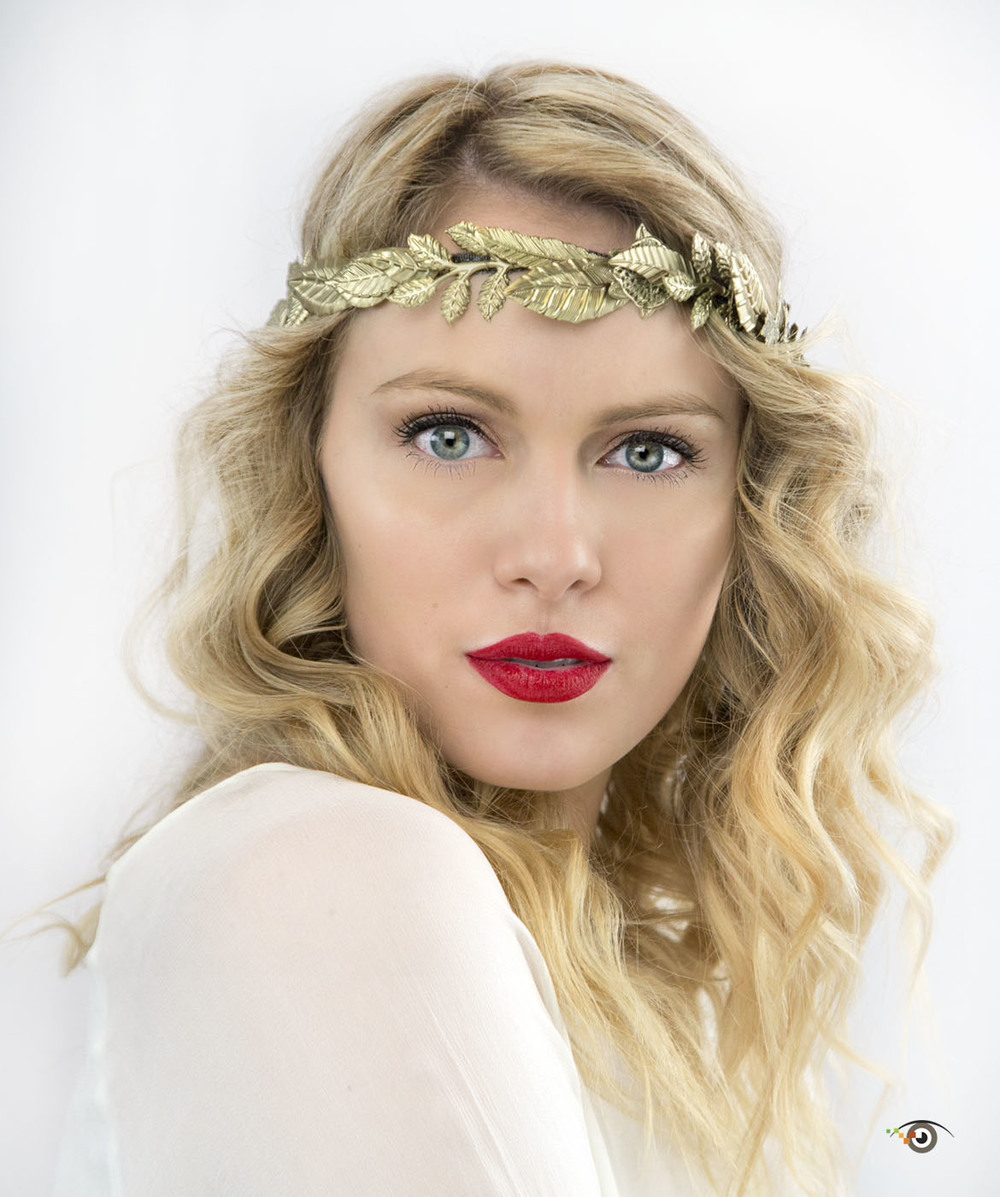
Note: For the portraits in this post, Rick used a Canon speedlite in a Westcott Apollo Soft Box.
1) When you think you need 2 lights, use 1 light. When you think you need 3, use 2. (A Frank Doorhof quote)
2) Be aware of other lighting in the room; you want your speedites lights to be the main source of light.
3) Umbrella spreads light evenly; soft box allows you to control and shape the light.
4) If you want an interesting portrait, don’t light the subject’s entire face.
5) For a portrait with few shadows on your subject’s face, you want the subject’s nose to follow the light; have their nose face the lighting source.
6) The size of a subject’s pupils affects our impression of the subject. The advantage of using a speed light is that the pupil doesn’t have time to close down, making the photo more inviting.
7) Never touch the model.
8) The larger the light source, the softer the light. The closer the light source is to the subject, the softer the light. For a soft constant light source, check out this Westcott lighting kit.
9) In lighting, inches matter.
10) Shadows are the souls of the picture.
11) Never underestimate the value of a good model.
12) Use your camera like a drone - move the camera up and down to effect the viewer’s perception of the subject. If you move the camera down lower, the model has you get a greater sense of power.
13) When looking through the viewfinder or at your LCD monitor, use border patrol - look at the boundaries of the photo and make sure what you want is in, or not in, the
frame.
14) Don’t amputate the subjects at the joints.
15) Name of the game is to fill the frame. Fill the frame with the subject.
16) The background can make or break the shot.
17) Most important thing in a photo is the mood/feeling. Backgrounds create moods.
18) Dead center is deadly. If you place the subject in the center of the frame, the viewer’s eye gets stuck on the subject and doesn’t look at other things in the photo.
19) Use gels over the light source (speed light) - red or blue to create an effect.
20) Focus on the subject’s eyes in a portrait.
• • • • •
Want more tips on home studio portraits? Check out Rick’s KelbyOne on-line classes.
From time to time here on my blog I'll run a post: "Photo Failed It Photo To Nailed It!" The concept is twofold:
1) I'll share a pair of pictures, along with tips, that illustrate how you can nail a shot;
2) You'll see that with a little effort - and sometimes by using accessories - you can turn a snapshot into a great shot.
This post: Add lights to add drama to a photograph.
Above is a failed shot from the shoot. The picture is flat and boring for two main reasons: boring and flat light and a boring pose. What's more, the background is overexposed.
To nail the shot, I . . .
• took an exposure of the background (a painted background) and then set the exposure exposure compensation to -1.
• used two Westcott Ice Lights – one positioned near the windshield and one positioned over the sunroof - to add shadows to the scene. Shadows are the soul of the photograph.
• directed the model and then moved in closer. The closer you are to the subject, the more intimate the photograph becomes.
• added props (sunglasses and cell phone).
• tilted my camera for the "dutch" effect.
• applied the Duplex filter in Nik Color Efex Pro. (All the plug-ins I use are listed on my Save on Plug-ins page.)
My camera/lens: Canon 5D Mark III and Canon 24-105mm IS lens.
As you can see, it did not take a lot of effort to nail the shot.
If you like model/people photography, I have a few 2015 photo workshops that you may enjoy.
Explore the light,
Rick
We've been back a week (almost to the hour) from our awesome adventure to Kenya's magical Masai Mara with our good friends Jonathan and Angela Scott - known and respected around the world as "The Big Cat People."
One of the highlights of the trip was a visit to Willima Pere's Village, where I took this portrait of Alex, who, to me, looked like the coolest dude in the village.
Portraiture is all about light and shadows - because light illuminates and shadow define, topics I talk about in my KelbyOne class on lighting.
The light in the portrait on the right is flat, so I think the portrait falls flat.
The portrait on the left has, to me, not only more light, but more life.
I added the light (brightness, color and contrast) by having our guide/driver/new friend, Simon Sitienie, hold the Sunlight side (as opposed to the Gold side) of the reflector in my Rick Sammon's On-location Lighting Kit and Tote so that the sunlight bounced beautifully onto Alex's face. The kit also contains a diffuser and speedlight diffuser.
Readers of my blog know that my favorite lens for on-location portraiture is the Canon 24-105mm IS lens.
I like the flexibility that this lens offers when it comes to composing a portrait, as well as its sharpness.
Stay tuned for more images from our visit to this village, and scroll down for more posts in this series.
Here's a fun shot of Simon checking out Jonathan's Canon 200-400mm IS lens. I used my 200-400 for most of my wildlife photographs on the trip.
Explore the light,
Rick
P.S. A special "thank you" goes to Governors' Camp for making our stay on the Mara, well, perfect.
When I give a seminar on making outdoor portraits, I suggest using a reflector/diffuser kit – the single most important accessory for the outdoor portrait photographer.
Sure, a speedlite is a valuable accessory, and I have one with me at all times. But if you are on a budget or want to travel very light – and can take ONLY ONE accessory – the reflector/diffuser kit is the way to go.
What? You thought a leaf blower was the most important accessory? Well . . . it can create a beautiful "wind in the hair" effect. :-)
Reflectors and diffusers enable us to control the light – turning bad/hard light into good light. I used a large reflector, like the one pictured above, to illuminate the model in the opening image for this post. The reflector filled in the shadows on the models face created by the harsh sunlight. It also added some nice catch-light to the model's eyes.
Quick Tip: When using a reflector, the subject often becomes brighter than the background – so you need to meter the scene carefully.
Above is another example of how a reflector enhanced a portrait. Below is a behind-the-scenes shot of me using my Westcott Lighting Kit and Tote.
Quick Tip: When using a reflector, tell the subject NOT to look at it: the reflected light can be blinding.
Diffusers soften harsh light.
Above is an example of how a diffuser turns harsh light into pleasing light.
Above is a behind-the-scenes shot of me using the diffusion panel in my Tote Kit.
All the gear I use for my on-location portraits is listed on My Gear Page. For more of my travel portraits, check out my World Portrait Gallery.
One final Quick Tip: Always respect the subject. Respect the subject and the subject will respect you.
My next model shoot is in NYC on November 4th. All indoors, but we'll use reflectors and diffusers, as well as Westcott Ice Lights, Spider Lights. Speedlites, too.
Learn about light on-line with my KelbyOne classes.
Explore the light,
Rick
Get a 41% discount on Photoshop Artistry: Fine-Art Grunge Composition.


