Blog — Rick Sammon Photography

Lightroom

Try Topaz DeNoise: A noise-cancelling plug-in

rick sammon 3.jpg

I'm on the plane (again!!), playing with plug-ins in Photoshop, while wearing my noise-cancelling headphones. Ahhhh, the peace and quite. 

As you may know, noise-cancelling headphones don't totally cancel all noise. They reduce noise, to different degrees, depending on the noise level and your definition of noise. A baby crying, for example, is not considered noise. :-)

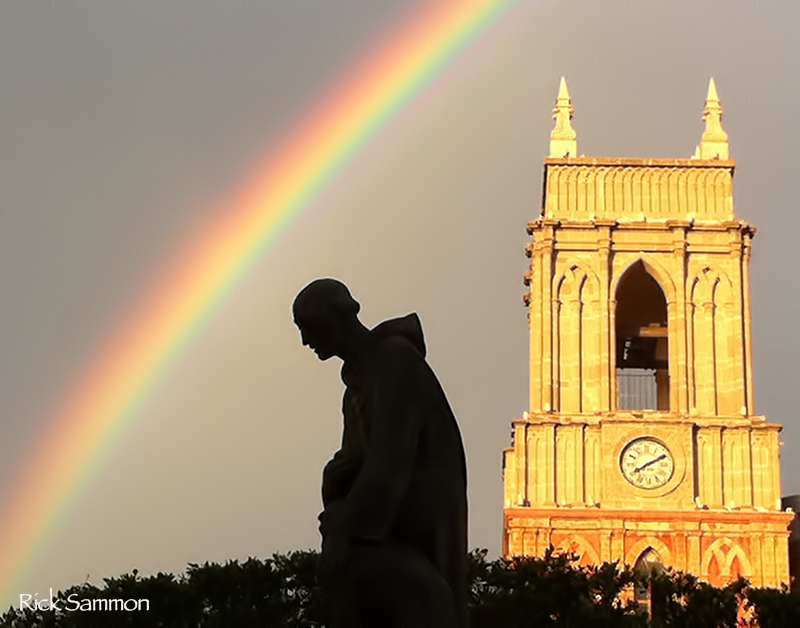
While thinking of noise, I opened a picture that I took with an early iPhone in San Miguel de Allende, Mexico. That image, with a fair amount of noise, is below.

rick sammon 1.jpg

To cancel the noise (actually greatly reduce the noise), I used Topaz DeNoise. I first used the sliders on the left to select the amount/type of noise to reduce. Then I used the slider on the right to fine-tune the noise reduction, in particular, in the shadow and highlight areas . . . somewhat independently.

By the way: all images have noise, even images shot at ISO 100 on a sunny day. 

Screen Shot 2013-09-29 at 8.57.03 AM.png

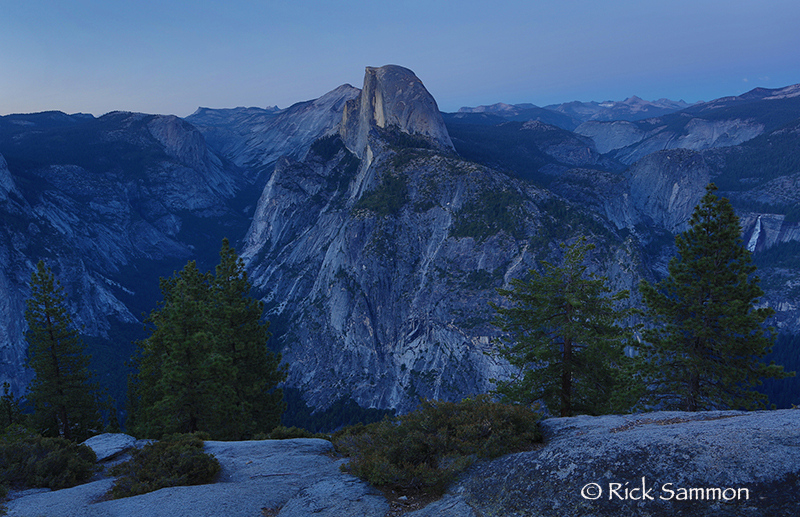
The result of using Topaz DeNoise is the image that opens this post. As you can see, the noise is greatly reduced.

Topaz DeNoise is only one of the plug-ins I suggest to my workshop students who want to improve their images. All the plug-ins I use are listed on my Save On Plug-ins page.

Explore the light,
Rick

Get Inspired, Set Goals & Make Awesome Images on My Digital Photography Workshops

rick sammon sunrise in africa.jpg

For the past 15 years, I've been helping photographers at all skill levels make better pictures through my digital photography workshops. I've met some amazing photographers and wonderful individuals, many of whom have become my friends. What's more, I've also learned a lot from the participants, which is kinda cool.

Oregon Grop.jpg

All are welcome on my workshops. We all work together - in the field and in the digital darkroom. We all set goals and make awesome images. And we have fun, illustrated by the group picture above that was taken on my Oregon Coast Photo Caravan.

Because "my specialty is not specializing," I help photographers with their individual interests, including: landscape photography, wildlife and nature photography, fill-in flash, HDR, action shooting, people photography, Lightroom, Photoshop and so on.

rsammon 1.jpg

Here is my advice to the photographers who come on my workshops:
"Stick like glue to the instructor." 
"Don't be shy about asking questions."
"The more you put in, the more you'll get out."
"Don't wait until the workshop is over to make a suggestion."
"Don't miss happy hour and our fun dinners."

2.jpg

Usually, we have daily photo processing sessions. We always have a group slide show at the end of a workshop. That group slide show is a great way to see how the photographers have grown - and to see how we each see and picture the world differently.

© Rick Sammon 1.jpg

Speaking of processing, I also teach plug-in on my workshops. I used several filters in Nik Color Efex Pro to create the image above from the image below. All the plug-in I use and teach are listed on my Save on Plug-ins page.

rick sammon 2.jpg

All my 2013 workshops are full, but I have spaces on my 2014 workshops. 

Click here to see my 2014 workshop lineup.  While you are on that page, scroll down to read the New to My Workshops articles. They will give you a look at my teaching philosophy.

temple 1.jpg

I hope to see you in 2014 on a workshop - around the country, around the world – or in "my backyard," where I took the above photograph on my Rick's Backyard Workshop.

If you can't get away for a workshops, I offer several on-line classes. Check 'em out and learn at your own pace. 

Explore the light,
Rick

My site is designed and powered by Squarespace. Try it for free. 

Rick's Product Pick of the Week: Wacom Intuos5 Small Pen Tablet

My product pick this week is the Wacom intuos5 Small Pen Tablet. I am using the USB model. A wireless kit is sold separately.

© Rick  Sammon.jpg

I've been using Wacom tablets at home for years. Now I take this small, compact and lightweight model on the road with me when I'm teaching my digital photography workshops and giving my seminars.

rick sammon.jpg

If you work (and play) in Photoshop or Lightroom, and burn and dodge, and selectively adjust specific areas of an image, the Wacom Pen Tablet is the way to go - because you can use the pressure-sensitive Pen like an artist uses a paintbrush and the Tablet like a canvas. That's how I enhanced the above image, which I took during a workshop in Venice, Italy.

Screen Shot 2013-07-25 at 2.11.34 PM.png

What's cool about the Wacom Pen Tablet is that you can customize the controls - like an artist mixes paints. But there's more: you can actually use your fingers on the tablet for additional creative control (including zoom, pan and tilt). Note: the ghost image of a painting that you may see in the above image is an image I'm working on for a project.

As I mentioned, I have the Wacom Intuos5 Small Pen Tablet. For at-home, all-the-time use, check out the Large model.

1a.jpg

Here's another image that I enhanced with the help of my Wacom Pen Tablet. Try signing your name on an image with a mouse. :-)

Explore the light,
Rick

P.S. Both of the subjects in these images were lit with the same equipment: Canon Speedlite in the Westcott Apollo Softbox.  All my gear is listed on My Gear Page.

Today's Lighting Tip: Play with Light In Lightroom

rick sammon 1.jpg

I  teach Lightroom and Photoshop on my workshops. Sure, we always try to get it right in camera, but there are times when the light is just not right for a good image.

Take this silhouette for example. The available light was flat and cold. By adjusting the Levels, and then by increasing the Contrast and Saturation, I was able to turn a flat shot into a fab shot.

Always try to envision the end result. It's kinda amazing what you can do in the digital darkroom - as long as there is detail with which to play. Here, if the sky had been too overexposed, there would not have been enough workable detail. Tip: always expose for the highlights - the brightest part of a scene.

For more tips on lighting, check out my apps

Explore the light,
Rick

Envision the End Result

rick sammon for web.jpg

For me, as a travel photographer, my pictures are often a 50-50 deal: 50 percent image capture, 50 percent image processing.​ Sometimes, I spend even more time on image processing than on image capture.

When shooting, I try to envision the end-result in Photoshop or Lightroom. That is something I stress to all my photo workshops students.

Here is just one example.​

rick sammon 2.jpg

While driving through Spearfish Canon, South Dakota, yesterday, I took the above grab shot.​ First, the quick grab shot is a bit tilted. Second, the picture is flat – and lacks color, contrast and details, due to the overcast sky.

All that was easily fixed, first in Photoshop by adjusting the Levels and with a bit of cropping. After that quick fix, I use NIk Color Efex Pro – applying the Detail Extractor, Darken/Lighten Center and Tonal Contrast filters.

As a final touch, I stretched the image to more of a panorama using Image Size in Photoshop, increasing only the Width and not the Height.​ I did that by un-checking the Constrain Proportions box in the Image Size widow.

Envision the end-result. Always.​

Explore the light,​
Rick

1291-43195.jpg