
Master Home Studio Lighting.
Order Cool Lighting Gear Today!

Photos from my KelbyOne Home Studio classes.
I promise you, you can make pro studio lighting portraits in your home . . . with some tips and some cool equipment. Scroll down to begin the photo learning (with end-result and behind-the-scenes shots) and photo fun. For now: Above left: indoors, boring natural light snapshot. Middle and right, same model with much more creative lighting, which I demonstrate in my KelbyOne Home Studio classes - listed on this page along with my other classes that can help you make pro quality images.
FYI. I give private, one-day home studio lighting classes in Croton on Hudson, NY. Shoot me an email if you are interested.
Need the following gear soon to start your lighting explorations? You can order the items directly from the links below!
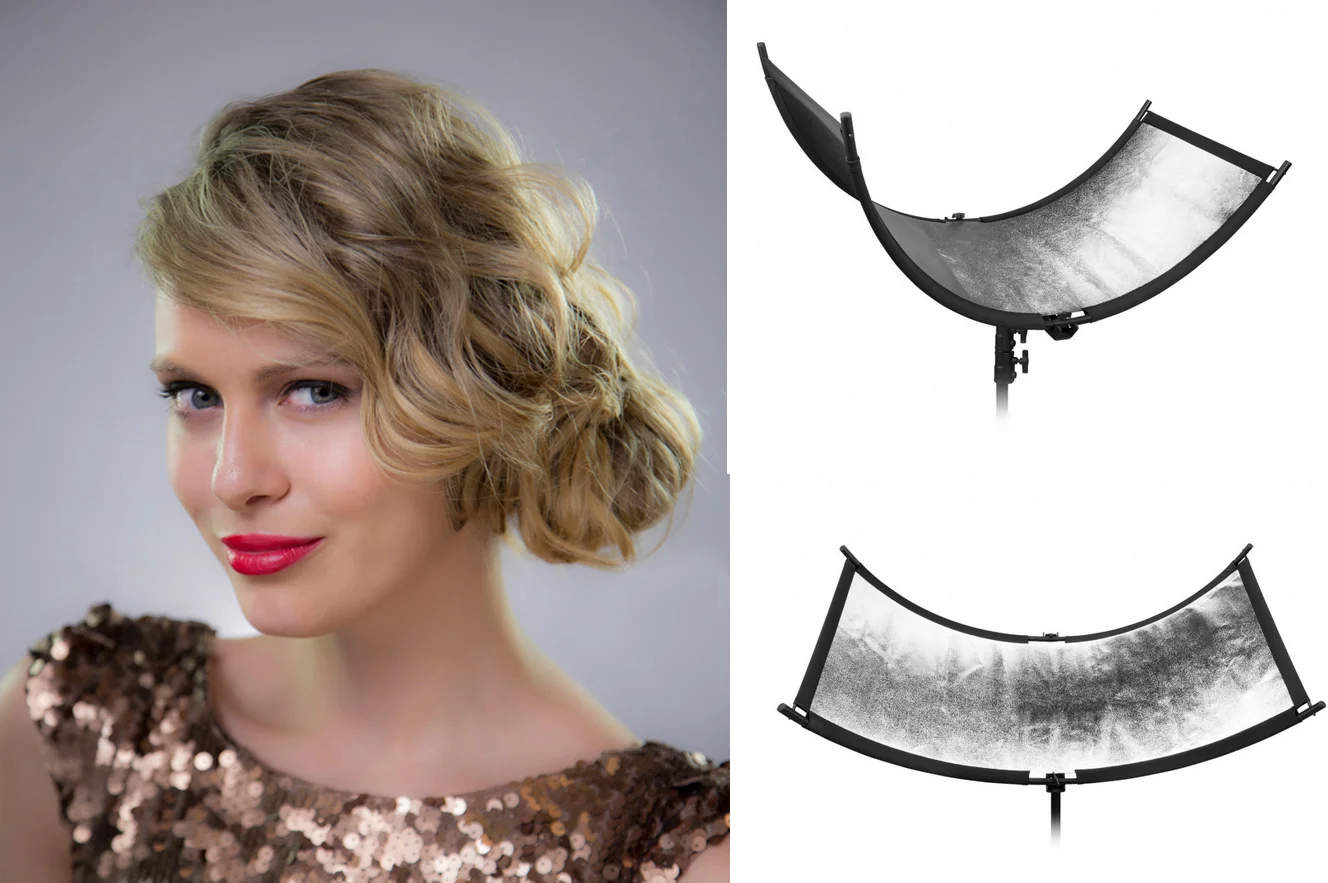
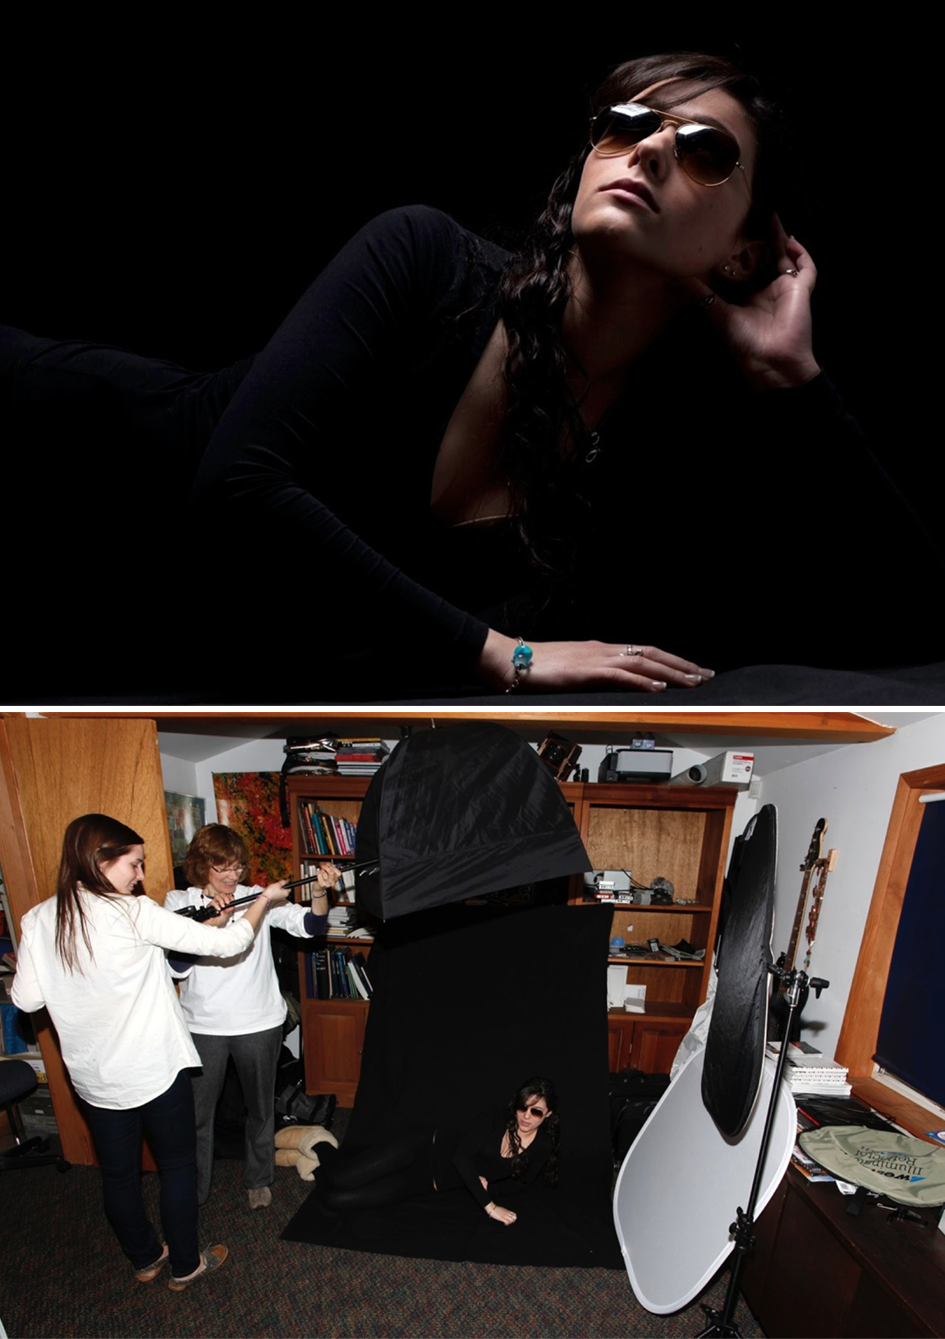
Lighting: Westcott Eyelighter (with continuous light above and behind the model). Tip: Follow the directions for the placement of Eyelighter very carefully. The Eyelighter must be in the correct position (distance and angle from the subject’s face) for a flattering effect. Otherwise, you may get some strange reflections in the subejct’s eyes.

Recommended Lights: Westcott Ice Light. Tips: Don’t be afraid to boost your ISO in low light situations - ISO here was 4000. Never underestimate the importance of a good model - and props and the background.

Recommended lights: Westcott constant lights (updated since my shoot). Tips: Experiment with light placement, which affects the shadows. Also, try using a smoke machine for a cool effect.

Recommended accessory: Westcott Reflector, part of the 6-1 kit, which also includes a diffuser. Tips: A reflector can be used to light a subject’s face, add catch light to a subject’s eyes, and add color and contrast to a subject’s face. Location: Papua New Guinea.
Light: One Canon speedite in a Westcott Apollo Apollo Softbox. Tips: Use “voice activated” light stands to place the light exactly where you want it placed! Also, when using this overhead lighting technique (and any close-up lighting set-up), moving the light just inches makes a big difference. Super important: make sure your speedlite is securely in place inside the softobox - so it does not fall out and hit your model on the head.

Yes, this is another one-light image. Canon speedlite in a Westcott Apollo Softbox. Kinda cool what you can do with one light! Location: Venice, Italy.

Here is one of my favorite home studio shots: my rendition of Vermeer’s Girl with a Pearl Earring. As you can see, just one speedlight in a Westcott Apollo Softbox. Tip: If you want an interesting portrait, don’t light the subject’s entire face . . . because shadows add a sense of depth and dimension to an image, and shadows are the soul of the photograph.

Learn more about lighting – and composition and exposure and travel photography – in my KelbyOne classes. Good fun and good info!