Lighting

Canon EOS 70D - Test Flight at CES 2014 . . . and a cool deal on this cool camera

rick sammon.jpeg

At the CES show last month in Las Vegas, and during an after-hours shoot, I had the opportunity to take my new Canon EOS 70D on a test flight, so to speak. Here are some of my favorite images, along with some tips. But first, if you are interested in a great deal on this cool camera, check out this sale.

Above: Brandy Cox, Canon's on-stage MC at the show, takes a well-deserved break aboard the jet that was parked in the hanger in which we shot at the airport. Tip: Don't be afraid to boost the ISO on the awesome and affordable Canon 70D camera. I shot this picture at ISO 6400 and see very little noise. Also, when you remove the color from a scene, you remove some of the reality. When you remove some of the realty, a picture can look more artistic and creative.

rick sammon 2.jpg

Above: Here's another shot of Brandy, the enhance version and the original. Tip: Cropping can give an image more impact; plug-ins can soften and change the mood of a picture. Also, see the light, as well as the shadows in a scene. I teach that stuff in my KelbyOne class, Light - the main element in every photograph. All my KelbyOne classes are listed here.

rick sammon copy 3.jpg

Above: The awesome hanger in which we shot. The shoot was set up by my fellow Canon Explorer of Light Clay Blackmore. Tip: When you don't have a wide-enough lens to capture a scene, shoot a pano. 

rick sammon.jpg

Above: Speaking of the awesome Clay Blackmore, here's Clay in action helping the photographers control the light. Tip: Control the contrast range of a scene by using a reflector or diffuser. I use a Westcott 6-in-1 kit.

© Rick Sammon.jpg

Above: Thanks Clay for helping me make this cool image of one of our models who was posed on the Batmobile. I enhanced the image with the Duplex Filter in Nik Color Efex Pro. (I am teaching plug-ins at Photoshop World in Atlanta in April. Hope you can join the session, as well as my travel photography session.) Tip: Get Clay Blackmore as your assistant. :-)

rick sammon copy.jpg

Above: Here are two photographs I made on stage at the Canon booth at the show. Thank you Chip Pearce for all your help with the lighting. You are amazing, and fun. Tip: Remember that a photograph is not a picture of a subject or object, it's a recording of light on an object. Also, if you want an interesting photograph, don't light the entire subject.

rick.jpg

Above: During my on-stage sessions I also invited people who had never used the Canon 70D on stage to shoot - to demonstrate the speed of the camera's AF system and the accuracy of the exposure system. Everyone got the shot – in less than one or two seconds, and that includes Jeff Cable, who is pictured shooting in this picture.

I also talked about the camera's Wi-Fi capabilities, filp out/touch screen, and full-HD video capabilities.

rick+by+steve.jpg

Above: That's me on stage at the show. (Pano by Canon's Steven Inglima, who heads up the Canon Explorer of Light program). Thanks to the folks who attended my talks. Tip: Come to one of my free seminars. As you will see, I like to make learning fun. For more hands-on learning, check out my workshops.

Explore the light,
Rick

P.S. At the show I met, for the first time, Shane Hurlbut. Check out the awesome work of this super talented Canon Explorer of Light.


Recreating a Rembrandt

sammon 2.jpg

What fun I had yesterday trying to recreate one of Rembrandt's paintings, "Old Man in a Military Costume." This new portrait was a follow-up to my "Girl with a Pearl Earring" portrait, which I took a few years ago.

rick sammon .jpg

Here's how I made the new image - and how you can do it.

Both portraits were taken in my office, which I converted to a studio for the photo sessions. The girl in "Girl with a Pearl Earring" photograph is my friend's daughter, Maggie. The man in my "Old Man in a Military Costume" photograph is my friend and artist Jay.

rick sammon 2a.jpg

For my "Girl with a Pearl Earring" photograph I used one Canon Speedlite in a Westcott Apollo Softbox. For my latest recreation of a master's paining I used Westcott TD5 Spiderlites, which have been updated with the TD6 Spiderlites. These lights produce constant, beautiful, soft, daylight-balanced light.

rick sammon 3a.jpg

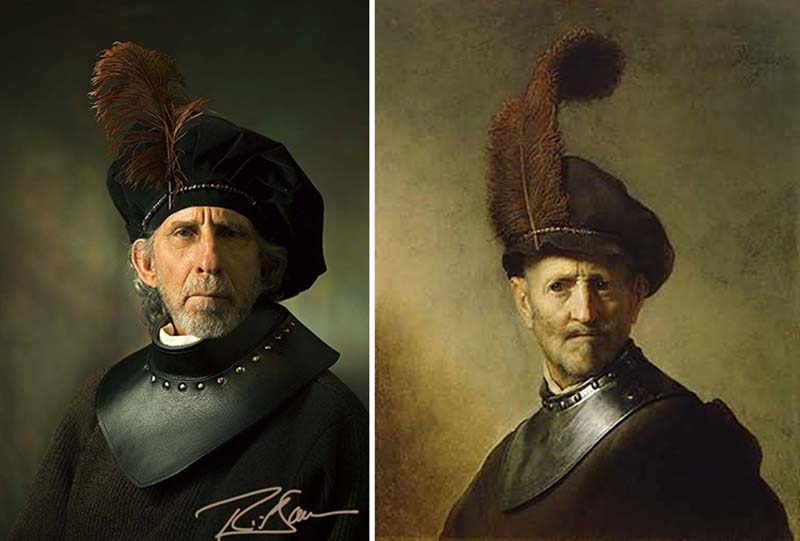
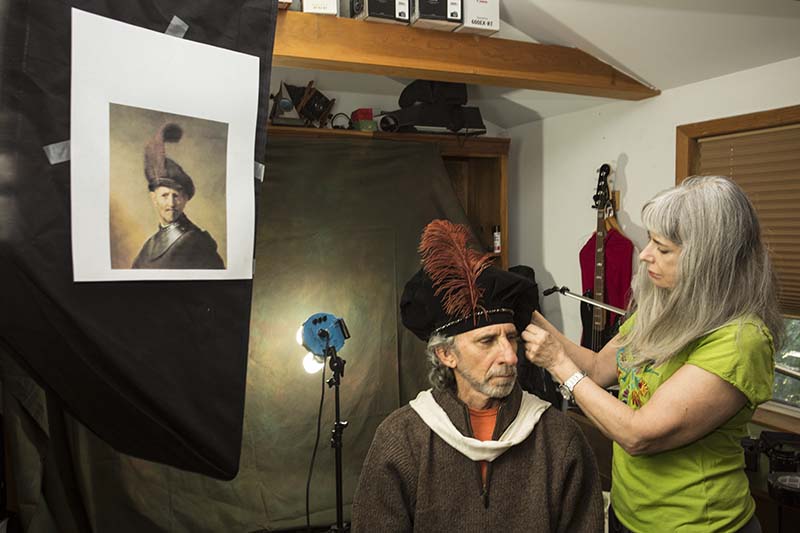
That's Croton-on-Hudson painter/my friend Eddi Fleming helping with the props. Those props, including the gorget in the final image, were major elements in creating the mood of photograph. Check out Eddi's web site to see her wonderful paintings.

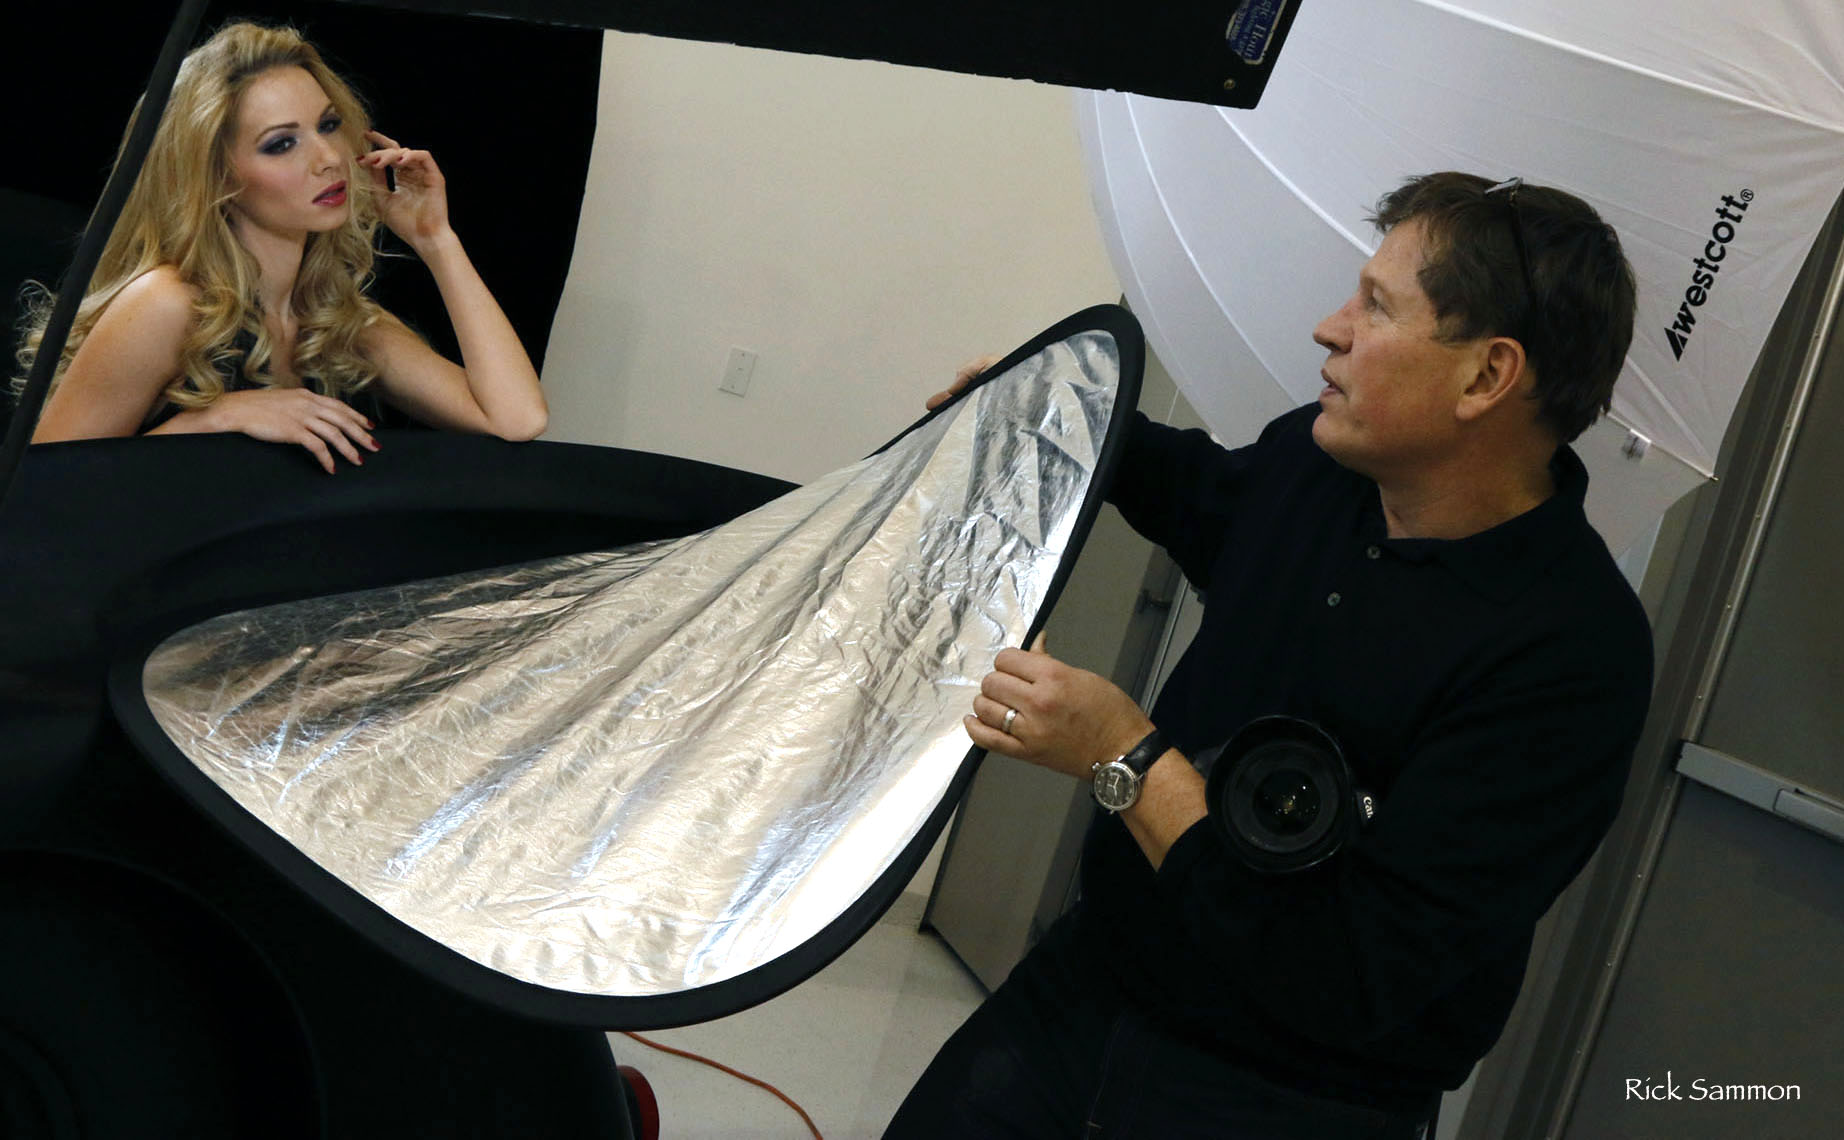
My main light was a Spiderlite in a Westcott 12 x 36-inch Stripbank, which was placed fairly close to the subject – because the closer the light, the softer the light. The Stripbank has a recessed front panel, which helps shape and direct the light, as opposed to some softboxes that don't have recessed panels. I used a bare-bulb Spiderlite to light the background, which was a Westcott Masterpiece Muslin Sheet Background.

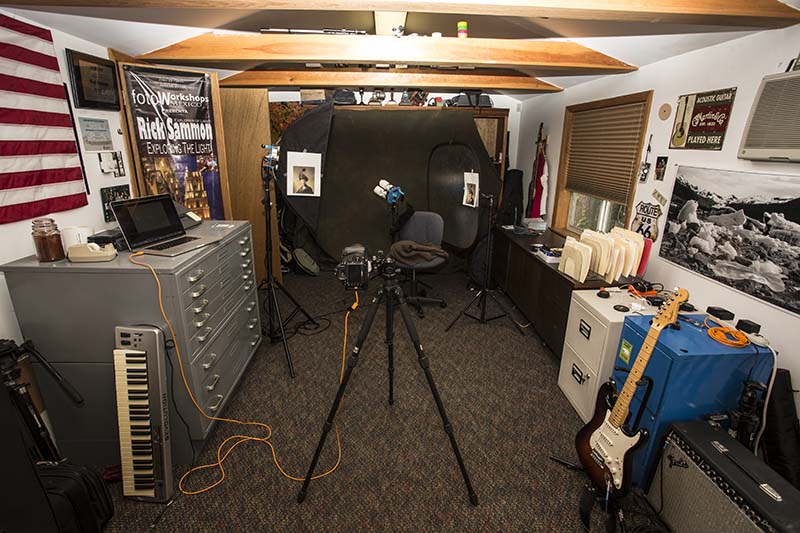
To check the lighting, especially the shadows, I printed copies of the painting I found on the Web and put them around my office. 

I shot with my Canon 5D Mark III and one of my favorite portrait lenses, the Canon 70-200mm f/2.8. I shot tethered to my Mac computer so we could all see a large image. I set up my camera on my Induro tripod.

Behind Jay (mostly out of sight) is a Westcott 6-in-1 Reflector Kit. I had planned to use the silver side of the reflector to fill in some of the shadows on Jay's face, but Eddi pointed out that Rembrandt often used deep shadows in his paintings, so I decided not to use that accessory.

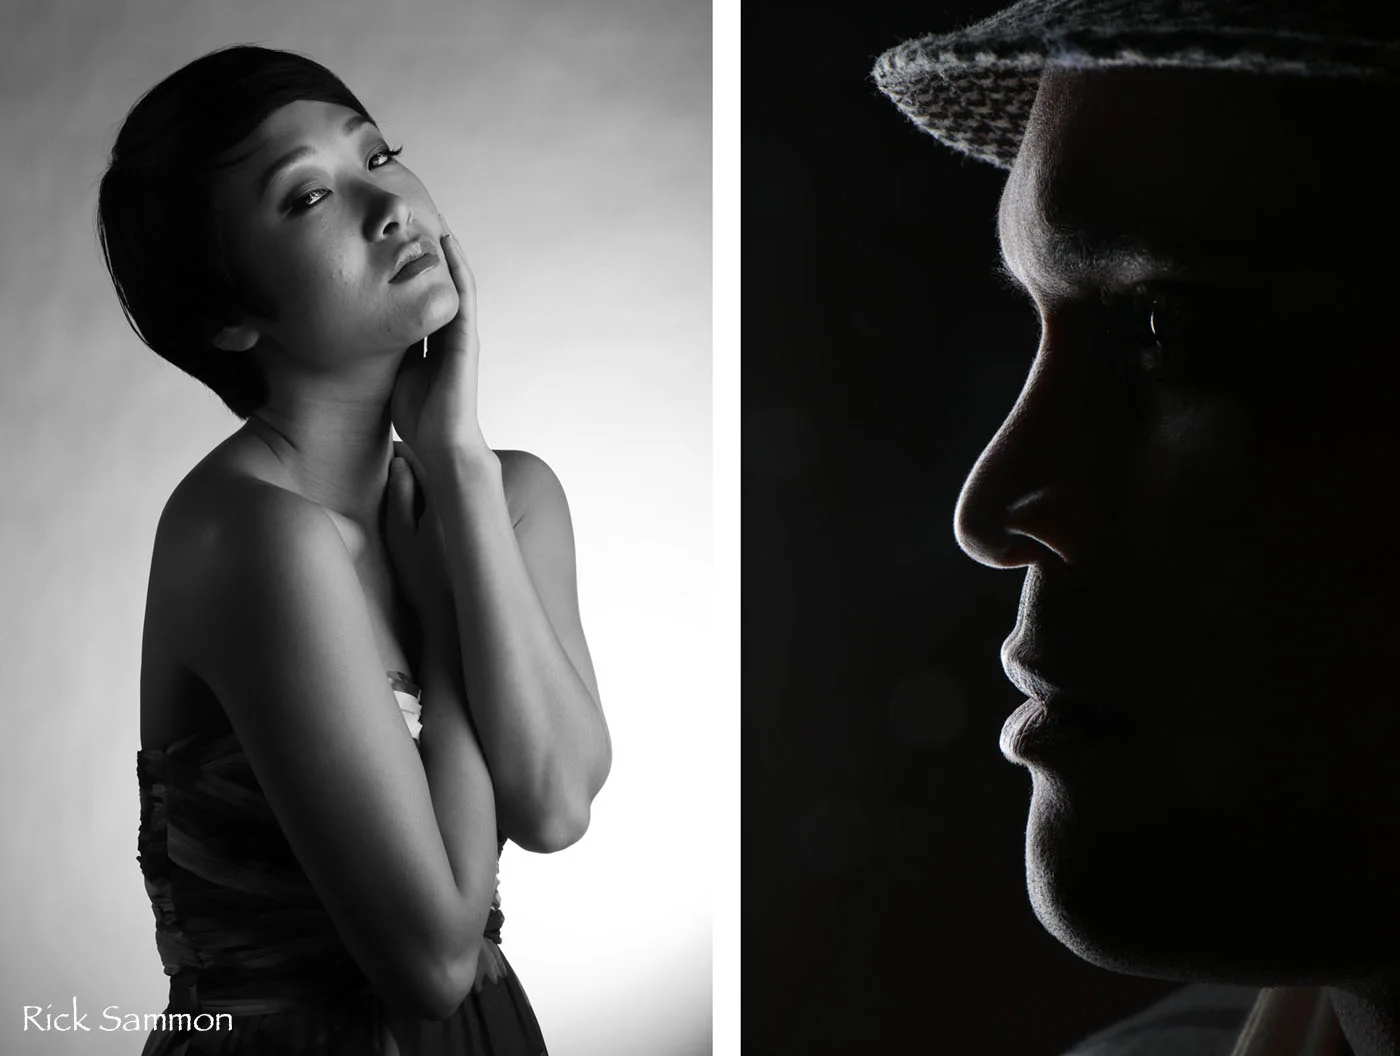
We can learn so much, especially about light, from studying the work of master painters, including: If you want an interesting portrait, don't light the entire subject.

Try recreating a masterpiece in your home. It's a challenge and good fun.  

Explore the light,
Rick

new PR 1.jpg

If you want to learn more about basic lighting, check out my iPhone and iPad app, Light it. Info on My Apps page. 

I also give private lighting lessons. Shoot me an email for info.