Animal Photography

Check Out My Latest KelbyOne On-Line Class: Capturing The Wild: Safari Photography

My latest KelbyOne on-line photography class, Capturing the Wild: Safari Photography, has just been released. The one-hour+ class is not just a presentation of pretty photographs. For each of the photographs I share a photography, travel or processing tip.

rick+sammon.jpg

The class (a live, in-studio narrated Keynote slide show) will help you "tell the whole story" of your photo adventure.

rick.png

In addition, you can use many of the same tips when photographing at a wildlife park, nature center, on a photo workshop, and while traveling. Animal, people and landscape photography are covered, as well as planning and packing for a trip. Basic digital enhancements are also illustrated.

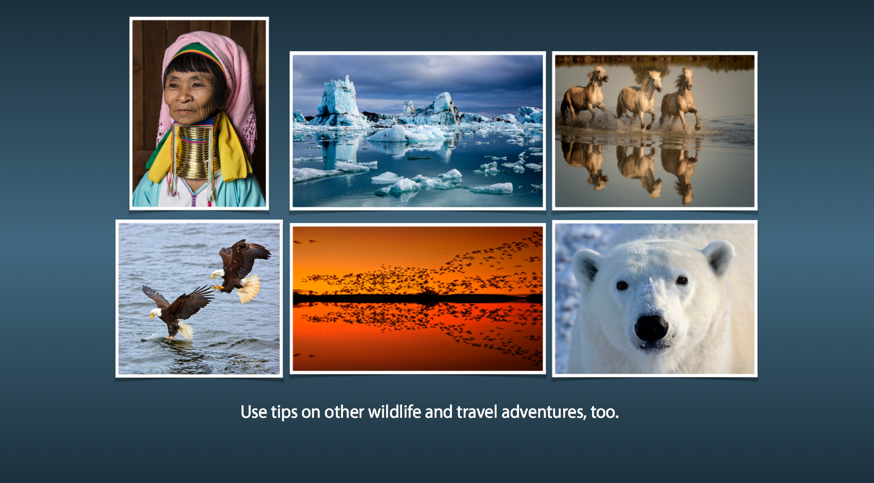
The class includes my favorite images from my photo safaris to Africa, as well a few photographs taken at my favorite wildlife parks, including Fossil Rim Wildlife Center in Texas. 

Screen Shot 2014-01-15 at 3.25.44 PM.png

I hope you enjoy the new class. I enjoyed working with the KelbyOne creative team on producing it.

All my KelbyOne classes are listed here.

Here are my favorite photo safari lenses:
Canon 400mm DO lens 
Canon  70-200 f/4 IS lens
Canon 100-400mm f/4.5-5.6 IS lens
All my gear recos are on My Gear page.

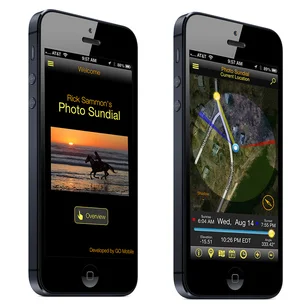
To help you find the best light on a photo safari, and on all your worldwide travels, check out my latest app, Rick Sammon's Photo Sundial.

The app also includes my best tips for photographing at sunrise and sunset. Other features include: Location Search, Weather, Moon Phases, Directions, Location Sharing.

Explore the light,
Rick

Day 5: Alaska Photo Workshop Week

Click images to enlarge.

In preparation for my Alaska Adventure digital photo workshop, listed on my 2014 Workshops page, I designated this week on my blog as Alaska Photo Workshop Week. Each day I posted a few images, taken on my previous adventures, along with some tips.

Today is the last day in my series. Scroll down to see my previous posts.

Hal Schmitt, my friend and lead instructor at Light Photographic Workshops, and I are co-leading this photo adventure. We will help you make and process wonderful images in Lightroom and Photoshop - and have a ton of fun. 

Day 3: Go with a great guide/naturalist.

You may be there greatest photographer who ever lived, but if you don't have a good guide/naturalist, you may miss many great photo opportunities, and probably will not maximize your shooting and processing time when visiting a new location. This is why, wherever I go, I always work with the best guide/naturalist/tour operator.

Our guide/naturalist/boat captain on our Alaska Adventure is Captain Dennis Rogers. Dennis knows the waters, and he knows animal behavior. Those skills help his guests make great wildlife and scenery images, from dawn to dusk.

Get a good guide/naturalist and you are on your way to making good photographs. 

rick sammon alaska.jpg

Hal and I hope to see you in Alaska.

I hope you enjoyed this series.

Explore the light,
Rick

This site created with Squarespace. Create your own space. Today!

Top Tips for Cool Zoo Pix

rick sammon.jpg

Even though I have been to Africa several times (and will be returning next year for my Kenya digital photograph workshop), I still enjoy photographing at zoos - especially at the Bronx Zoo, where I took the images for this post.

Here are some helpful tips for your next zoo shoot.

Go for behavior shots, like the ones you see here, as opposed to static portraits. Behavior shots tell more of a story, but are, admittedly, harder to capture.​

Call the zoo in advance and ask if any groups will be at the zoo during your proposed shoot times. Several bus loads of kids, as cute as the kids may be, may make shooting in confided spaces, such as Jungle World at the Bronx Zoo, a bit tricky.​

Speaking of Jungle World, when you are in an indoor exhibit where it is humid, don't change lenses. If you do, your lens and mirror can fog. Worse still, your image sensor could fog.

Ask beforehand if a tripod or monopod is allowed. Some zoos say "no" due to insurance policies.

Also ask about feeding times. You may get more action shots before and during feeding times, as opposed to getting sleeping shots after feeding times.​

Lens recommendations:​ 100-400mm for close-ups of the animals, 24-105mm for environmental shots.

For portraits of the animals, shoot at a wide aperture to blur the background, which may be a dead giveaway that your picture was taken in a zoo.

You can blur a foreground wire fence if you hold a telephoto lens very close to the fence and shoot at a wide aperture.​

You'll definitely want to pack a polarizing filter to reduce glare on the windows of the displays.​

Pack a flash for daylight fill-in flash shots.​

Pack light and have easy access to your gear and gear bag, which you want to keep in sight at all times.​

Inside: Don't be afraid to boost your ISO to get a fast shutter speed, which is often needed for steady shots with long lenses.​

Where ever you shoot, lighting and composition is important. You can lean about both topics by watching my on-line composition and lighting classes.​

Have fun on your next photo adventure at the zoo.

shows giraffe rain.jpg

Shoot me an email if you are interested in my 2014 Kenya Photo Safari.

Explore the light,
Rick

P.S. If you want to add a creative touch to your images, play with plug-ins. My favorites are listed on my Save on Plug-ins page.​

Screen Shot 2012-12-17 at 1.49.33 PM.png

This post sponsored by Adorama - great gear at great prices.

This site powered by (designed and hosted on) Squarespace. Use one-click to get started with your own awesome Squarespace site. ​