sunrise

Self-Assignment/Photo Challenge: Shoot into the Sun

From time to time I will post self-assignments/photo challenges here on my blog. Self-assignments are a good way to learn and grow as a photographer. Try 'em by yourself or with a friend.

If you take the challenge, you can post your photos on my Rick Sammon's Photo Challenges Google+ page.

FYI: This Photo Challenge is one of the several photo challenges in my forthcoming Focal Press book (Spring 2015) on visualizing and developing your eye. Shoot me an email to get on the book announcement list.

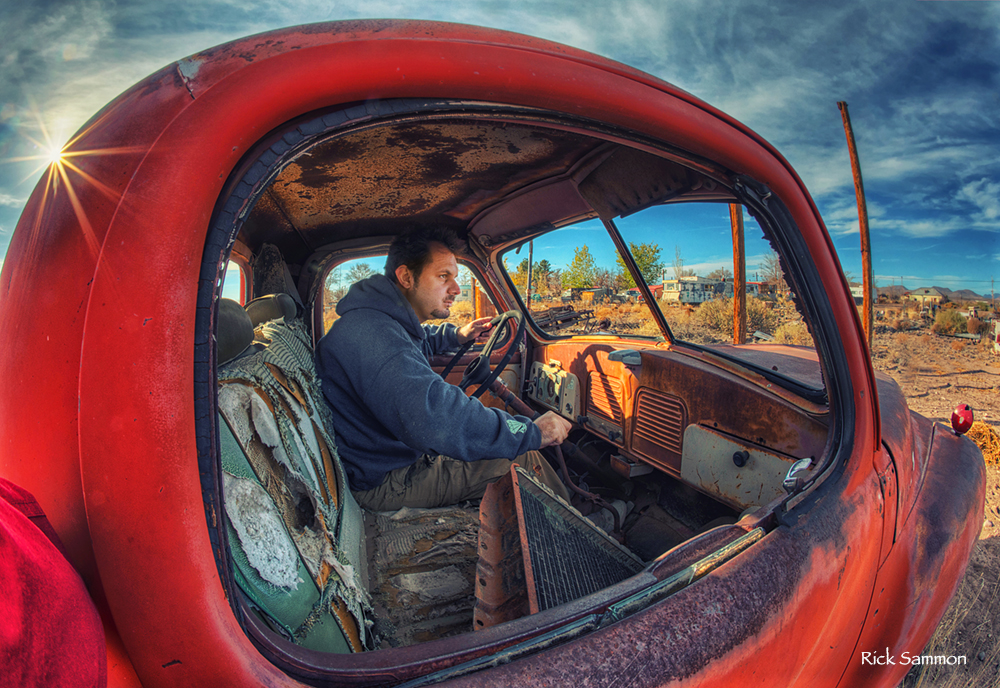
Assignment: Shoot Into the Sun

Concept: Use HDR to capture the entire dynamic range of a scene when shooting into the sun. Have the sun just peak out from behind an object. Use an aperture of f/22 to get the starburst effect.

The starburst effect is enhanced with wide-angle lenses, so the wider the lens the better. Here I used my Canon 15mm full-frame fisheye (but I now have the 8-15mm lens) on my Canon 5D Mark III full-frame image sensor camera. When a true fish-eye lens is used on a cropped image sensor camera, you don’t get the fish-eye effect.

Make sure your lens is very, very clean, as just one speck of dust can look like a big blob in your image. Take enough photographs over and under the average exposure setting to capture the shadow detail (over exposed images) and highlight areas (underexposed images).

If a person is your HDR sequence, have him or her very, very still while you are taking several exposures. That is the direction I gave my friend Mike “Spike” Ince when I made this HDR image.

As you can see in the above image, the contrast range was too great for all the detail in the scene to be captured in a singe photograph.

By the way, this is a hand-held HDR image. Wide-angle lenses and rapid frame advance make hand-held HDR images possible.

Processing Suggestions: Use Photomatix to create your HDR negative, and then process your HDR file in Photoshop or Lightroom. You can get a discount on Photomatix on my Play and Save on Plug-ins page.

Remember that HDR images tend to look a bit flat, because you are compressing the brightness range of a scene. Therefore, you need to add a bit of contrast if you want your image to pop.

If you like HDR, I teach that technique on many of my workshops.

Location: Junkyard near Bosque del Apache, New Mexico

Explore the light,
Rick

Day 6: Seven Days of Sunrise/Sunset Photography Tips

11 copy.jpg

To celebrate the release of my Photo Sundial app, which runs on the iPhone and the iPad,  I am running a series here on my blog: Seven Days of Sunrise/Sunset Photography Tips. Each day I'll share two tips from the Gallery section of the app, for a total of 14 images. Check out all the images in the app, which is on sale for only $2.99 until September 30th.

Today is Day 6.

Above: Expose for the Highlights. In high-contrast situations, it’s important to expose for the highlights. Make sure your camera’s highlight alert feature is activated and avoid “blinkies.” Also check your histogram and make sure you don’t have a big spike on the right. Location: Spearfish, South Dakota.

12 copy.jpg

Above: Have Fun with Plug-ins. Plug-ins can help us awaken the artist within by removing some of the reality from a scene. Here I used Topaz Adjust to increase the color, detail and contrast to my image. Location: Angkor Wat, Cambodia.

new main.jpg

Read more about Photo Sundial - the app that helps you find the position of the sun so you can make awesome images - and much, much more.

Explore the light,
Rick